COS + Github Actions 实现语雀自动发布
配置 Github Actions
Secrets
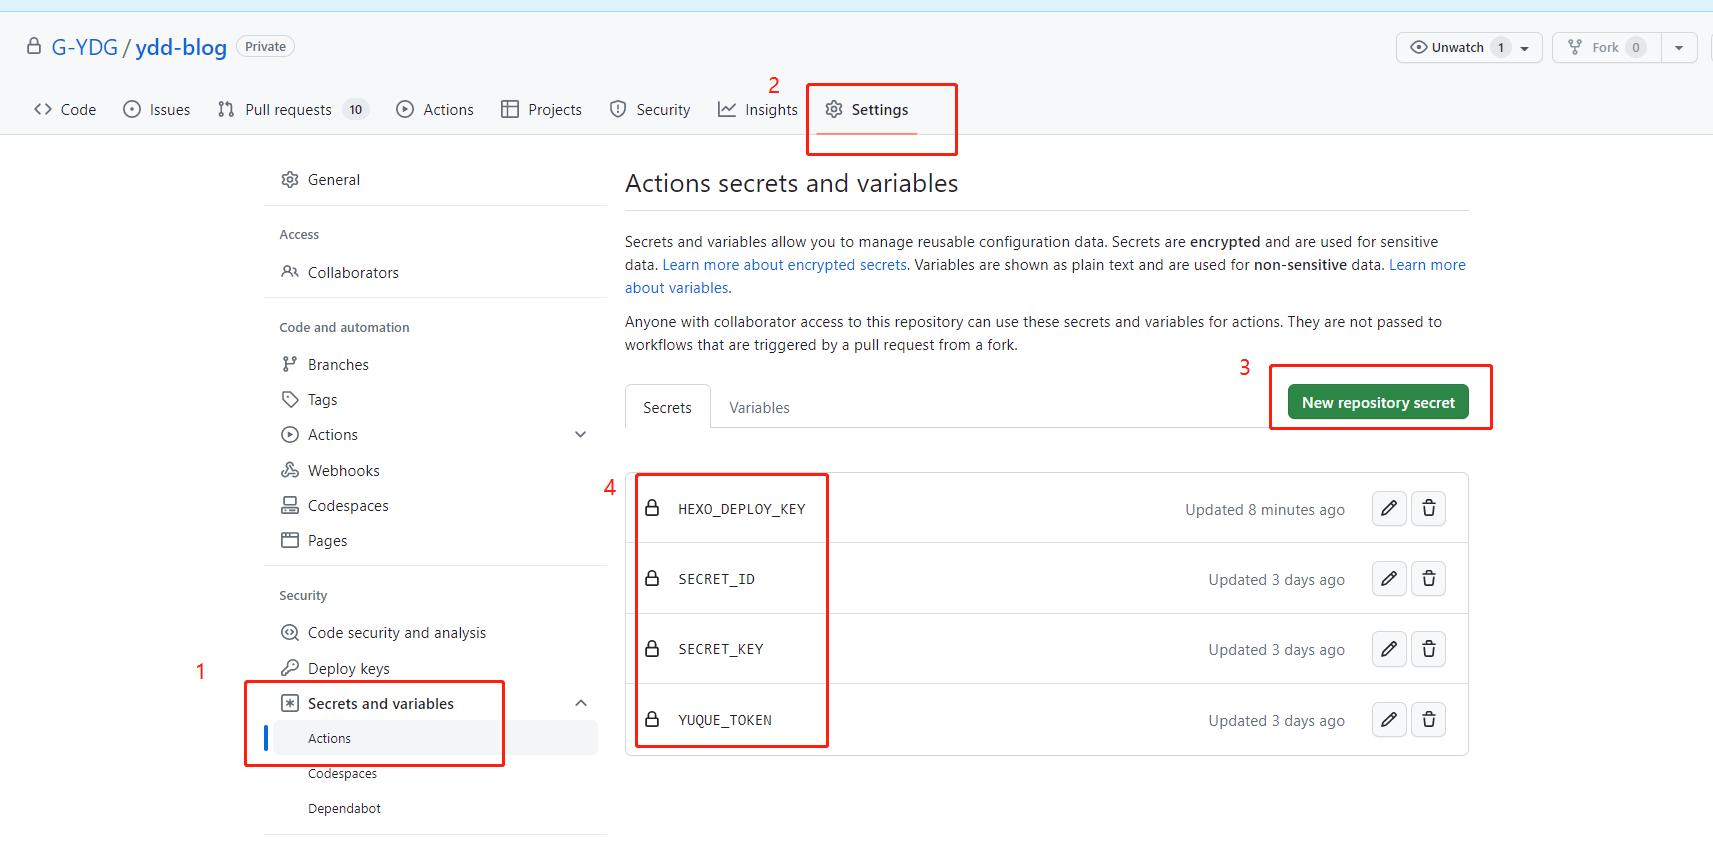
| SECRET_ID | 操作员账号 |
|---|
| SECRET_KEY | 操作员密码 |
| YUQUE_TOKEN | 语雀访问令牌 |
| HEXO_DEPLOY_KEY | 部署私钥(用于 hexo deploy) |
Workflows
在根目录下,新增 **.github/workflows/main.yaml **文件
1
2
3
4
5
6
7
8
9
10
11
12
13
14
15
16
17
18
19
20
21
22
23
24
25
26
27
28
29
30
31
32
33
34
35
36
37
38
39
40
41
42
43
44
45
46
47
48
49
50
51
52
53
54
55
56
57
58
59
60
61
62
63
64
65
66
67
68
| name: Deploy
on:
repository_dispatch:
types:
- start
jobs:
build:
runs-on: ubuntu-latest
steps:
- name: checkout
uses: actions/checkout@master
- name: install node
uses: actions/setup-node@master
with:
node-version: "16"
- name: 安装依赖
run: npm install
- name: 语雀同步
env:
SECRET_ID: ${{ secrets.SECRET_ID }}
SECRET_KEY: ${{ secrets.SECRET_KEY }}
YUQUE_TOKEN: ${{ secrets.YUQUE_TOKEN }}
run: |
npm run yuque:clean
npm run yuque:sync
- name: 博客构建
run: |
npm run clean
npm run build
- name: GIT配置
run: |
git config --global user.name "your name"
git config --global user.email "your email"
- name: 提交变更
run: |
echo `date +"%Y-%m-%d %H:%M:%S"` begin > deploy.txt
git add .
git commit -m "Refresh content" -a
git pull origin master
- name: 推送变更
uses: ad-m/github-push-action@master
with:
github_token: ${{ secrets.GITHUB_TOKEN }}
- name: 博客发布
env:
HEXO_DEPLOY_KEY: ${{ secrets.HEXO_DEPLOY_KEY }}
run: |
mkdir -p ~/.ssh/
echo "$HEXO_DEPLOY_KEY" > ~/.ssh/id_rsa
chmod 700 ~/.ssh
chmod 600 ~/.ssh/id_rsa
ssh-keyscan github.com >> ~/.ssh/known_hosts
npm run deploy
|
构建测试
命令行 curl 链接,手动触发查看是否可以构建成功。
1
2
3
4
5
6
| curl --location --request POST 'https://api.github.com/repos/用户名/仓库名/dispatches' \
--header 'Authorization: token GITHUB访问令牌' \
--header 'Accept: application/vnd.github.everest-preview+json' \
--header 'Content-Type: application/json' \
--header 'User-Agent: curl/7.52.1' \
--data-raw '{"event_type": "start"}'
|
如下图所示,则说明可以构建成功。

配置腾讯云函数
由于语雀的 webhook,不支持 POST 请求以及自定义请求头,所以咱们通过腾讯云的云函数进行处理。
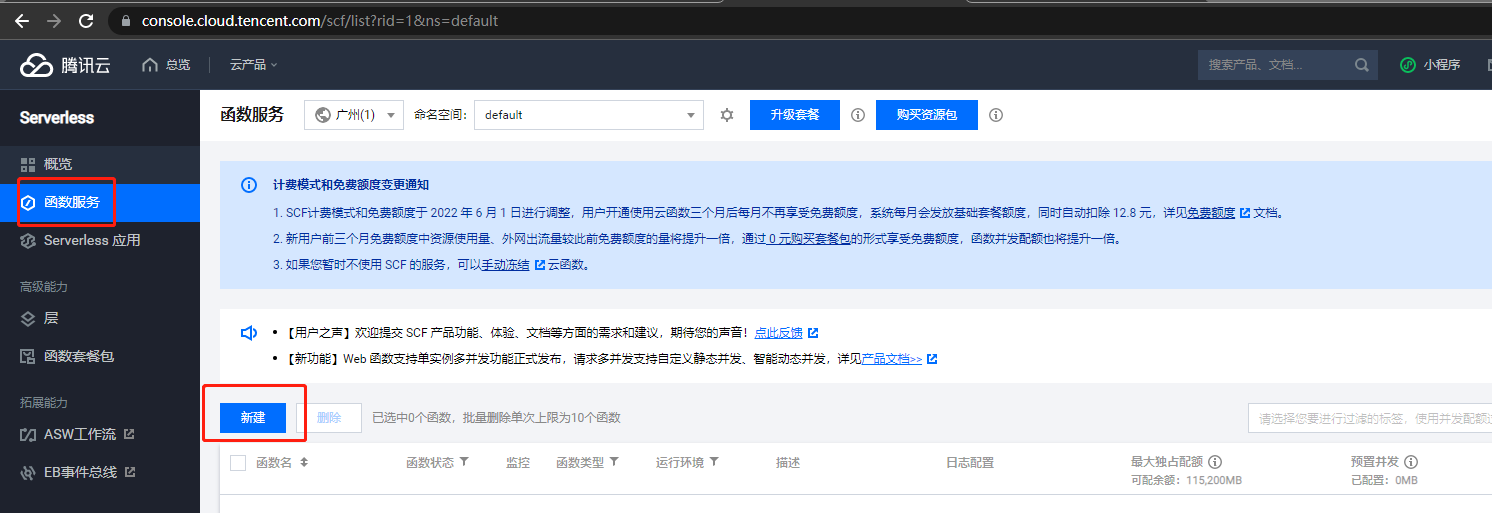
访问 Serverless 控制台,选择函数服务,新增云函数。
模板选择“从头开始”,函数类型选择“事件函数”,运行环境选择“python2.7” 。
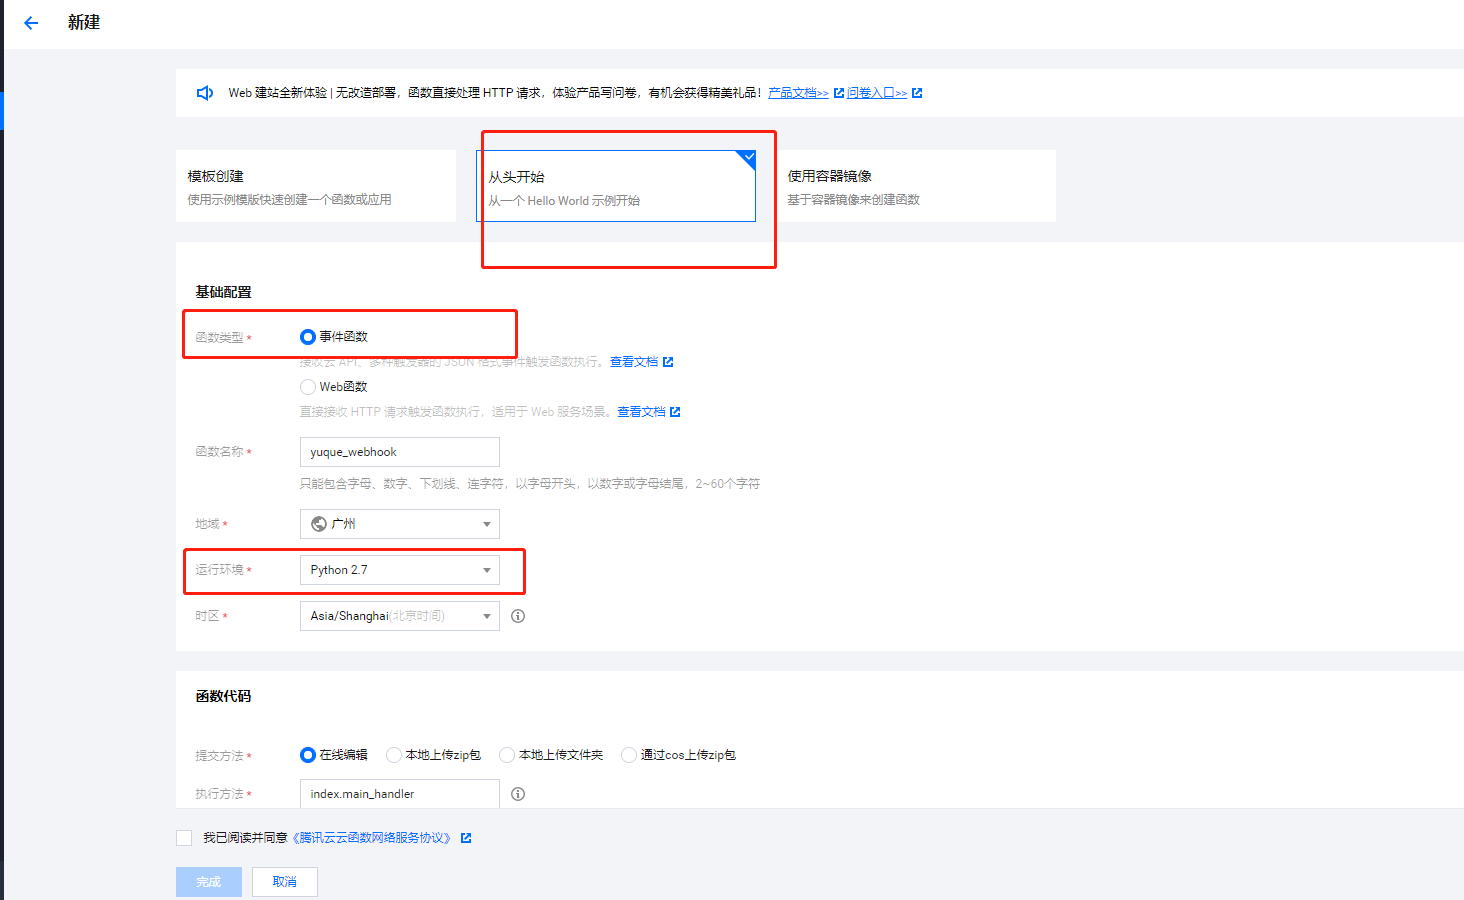
函数代码选择“在线编辑”,代码如下。
1
2
3
4
5
6
7
8
9
10
11
12
13
14
15
16
17
|
import requests
def main_handler(event, context):
url = "https://api.github.com/repos/用户名/仓库名/dispatches"
payload="{\"event_type\": \"start\"}"
headers = {
'Authorization': 'token GITHUB访问令牌',
'Accept': 'application/vnd.github.everest-preview+json',
'Content-Type': 'application/json',
'User-Agent': 'curl/7.52.1'
}
response = requests.request("POST", url, headers=headers, data=payload)
if response.status_code == 204:
return "This's OK!"
else:
return response.status_code
|
注:event_type 的值需要和 Github Actions 中配置的 repository_dispatch 的 types 值保持一致。
注:Authorization 值为 字符串 “token Github 访问 token“。
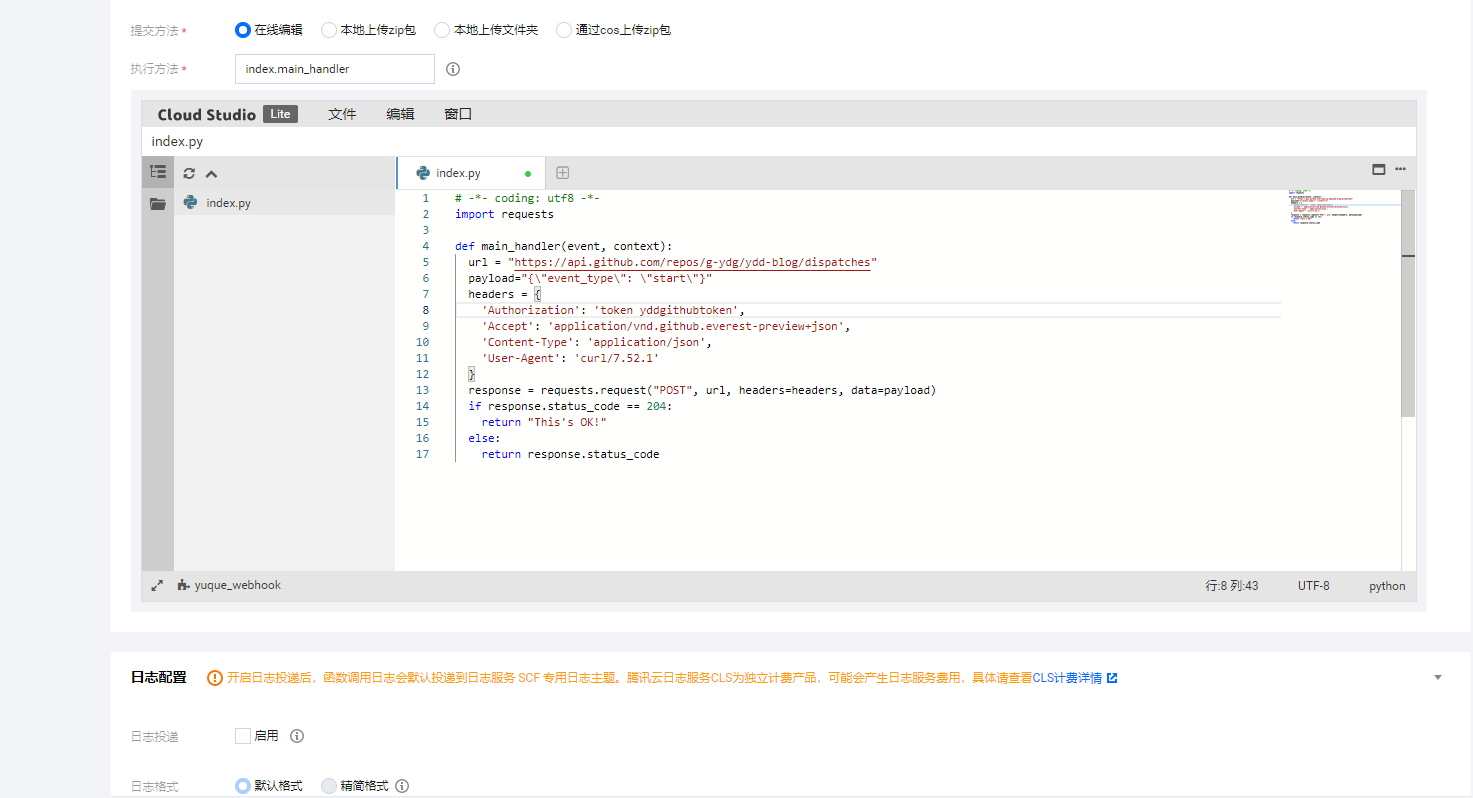
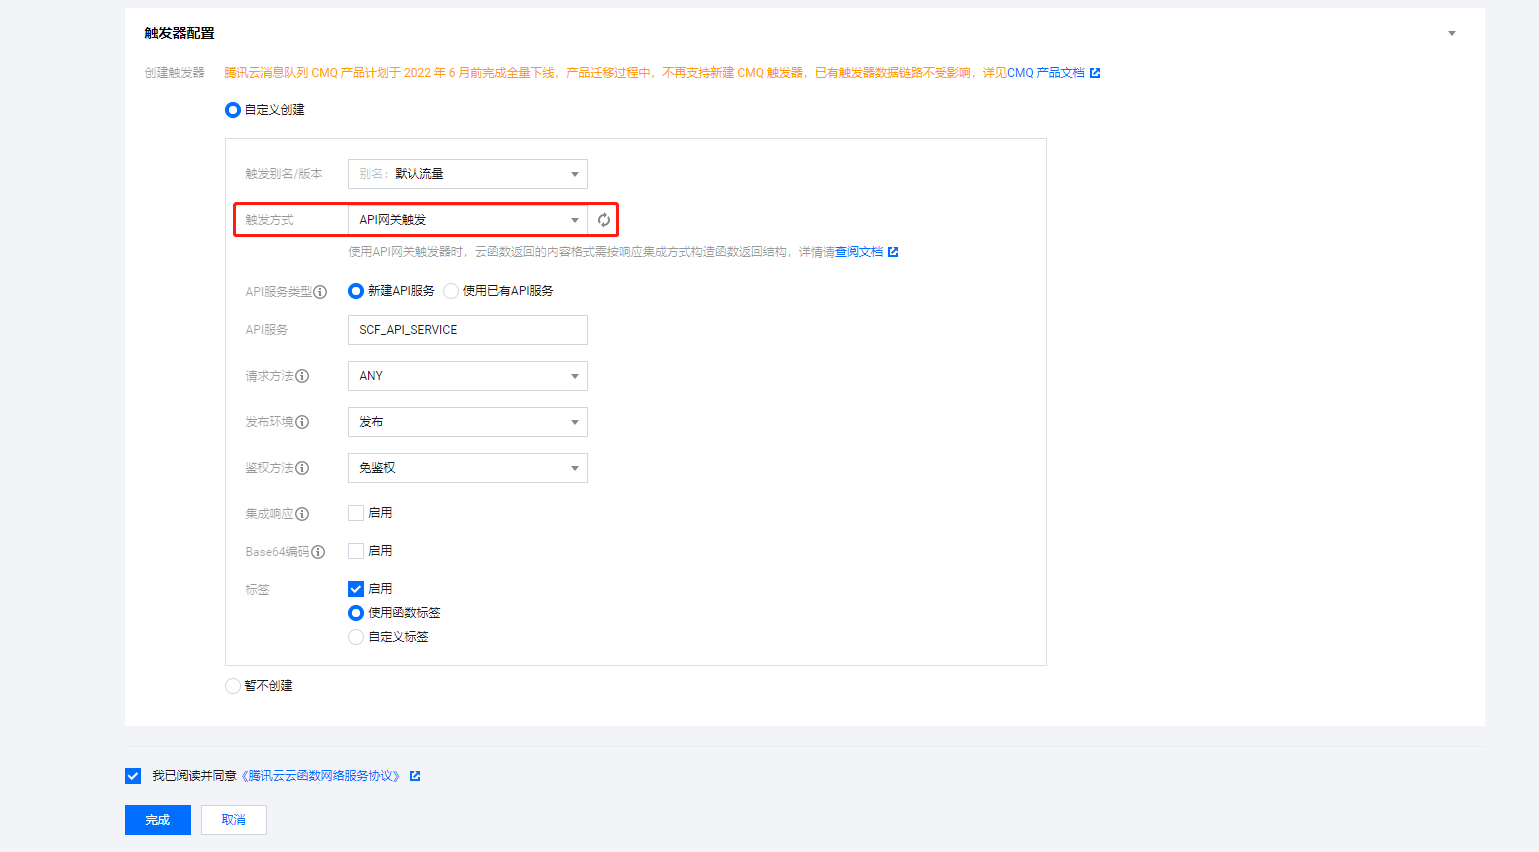
触发器配置,选择“自定义创建”,触发方式选择“API 网关触发”
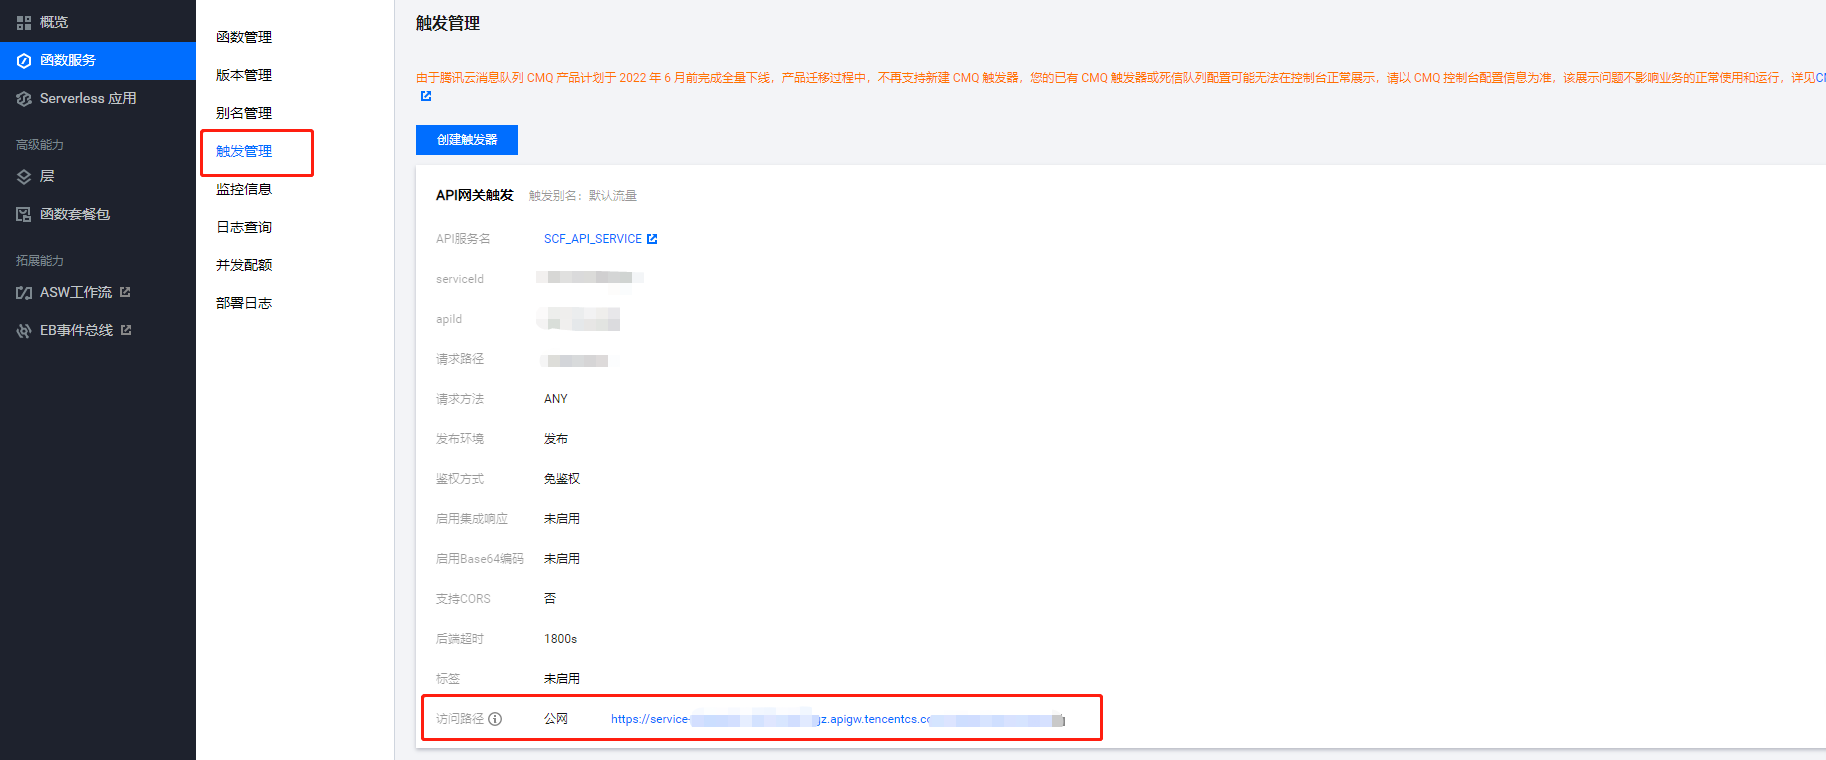
完成创建后,点击查看云函数的公网访问路径。
配置语雀 Webhook
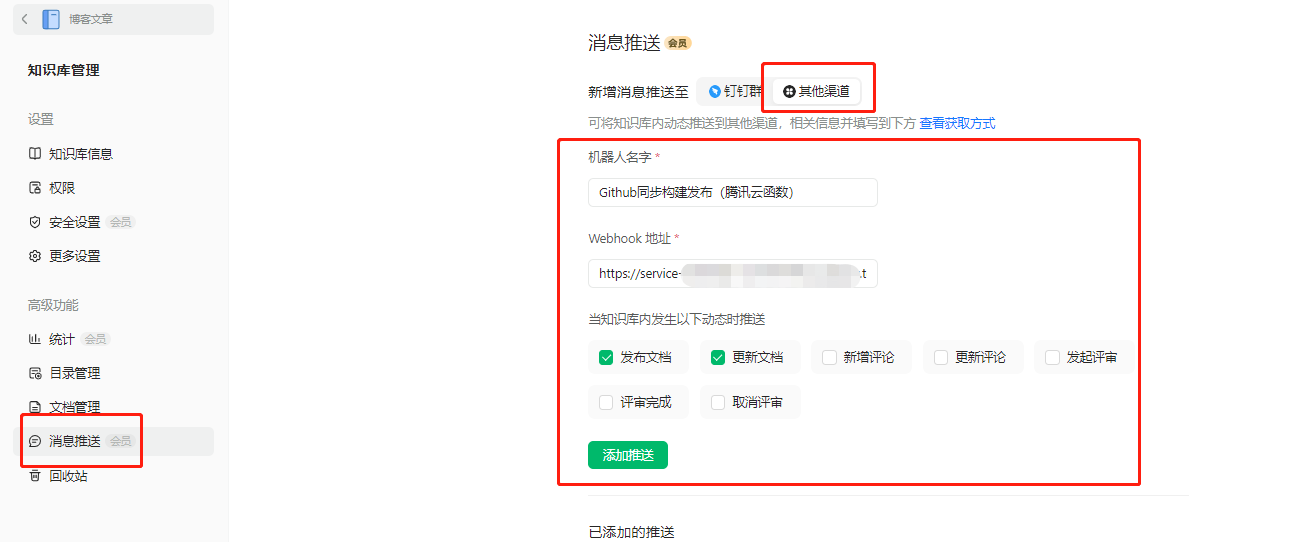
知识库设置 -> 消息推送 -> 其他渠道 -> 添加推送。
